This post may contain affiliate links and/or codes. You won’t pay anything extra, but I might make a commission.


Sourdough bread is crusty, flavorful, and not that difficult to make, but you need some sourdough starter in order to bake some. I’ve created my own wild yeast starter many times using just a couple of simple ingredients (no commercial yeast!!), and I’ll lead you through the different stages of making, feeding, and storing sourdough starter so that you’ll always have some on hand for baking.


What is sourdough starter?
Sourdough starter confuses a lot of people. Some think it’s just another kind of yeast you buy in grocery stores to make a certain kind of bread. Others think it’s something super old that you have to order from San Francisco. And a whole lot of people think it’s a really complicated, involved process. Some even liken keeping sourdough starter alive to having a pet!!
The truth is far simpler, so let’s start with the basics.
Sourdough starter is simply wild yeast that you can grow yourself, using just flour and water. It picks up good bacteria—from the air, from your hands, from the flour itself—and bubbles are created from that bacteria growing and eating.


Those bubbles are what will eventually make your sourdough bread rise! Isn’t that cool?
Whenever I make bread from my own homemade starter, I get the same feeling as when I grow something in my garden. I’m always a little amazed that I created something myself.
I learned how to make it about seven years ago from a wonderful book called Tartine Bread, by Chad Robertson. If you really want to get into making all sorts of sourdough baked goods, I highly recommend this book. Not only is it full of fantastic recipes, but it goes deep into all aspects of sourdough, with detailed instructions and pictures.
How do you use sourdough starter?
Sourdough starter is an ingredient in all sorts of baking recipes. Mostly, I make bread with it.
Usually, you start the night before by making what’s called a leaven. Basically, you take a small amount of your active starter and add more flour and water, and that grows overnight to a light, airy, bubbly mass that will make your bread rise.
You can also use sourdough starter in discard recipes. You have to get rid of most of your starter at each feeding. Otherwise, your starter would just keep getting bigger and bigger, and you’d have to feed it enormous amounts of flour to keep it alive. Unless you’re building up the volume of your starter to bake with it, you just need to keep a tiny bit of starter alive.
Discard is what’s leftover after you feed your starter (you discard it, get it??).
So, you can use the discard in all sorts of recipes. But that’s a secondary use.
How often do you have to make and feed starter?
I usually make some from scratch in the fall, when the weather starts to get colder and I get into a bread-baking mood (it’s much nicer to have the oven on then). I keep it on my counter, feeding it every day, and once or twice a week I bake with it. And then in the spring, I get rid of it.
However, if you don’t want to bake that frequently, there’s no reason to keep it out all the time. You’ll just be wasting flour. Sourdough starter keeps very well in the refrigerator. Ideally, you would feed refrigerated starter once a week, but it can last longer than that. I’ll get into that farther down in the post.
I could also just store it in the fridge in the warmer months, instead of making it again each fall. But I kind of like making it! It signals the beginning of my least-favorite time of year, and I cheer myself up with the promise of warm bread.
Can you buy sourdough starter?
Absolutely. My very first starter—which is still alive after about ten years, by the way—was one that I bought online. Supposedly it was from a starter that’s more than 100 years old.


You can buy dehydrated starter, or fresh starter. Or, if you have a friend who bakes sourdough bread, you can just ask for some starter! Bakers are literally throwing some starter away every time they feed it.
Incidentally, you may be wondering why I make a new starter every fall if I have a ten-year-old starter in my fridge. The one I make from scratch is very different from the older one in that picture up there. The one I grow myself is fed with half whole wheat flour and half bread flour, while the older one has always been fed with plain old all-purpose flour. The older one has a very different smell, and a much milder flavor. So, I keep both around, for different uses.
For example, my son doesn’t really like the super-crusty Tartine sourdough loaves that I love. But he does like this bread made with my milder starter.
How long does it take to make sourdough starter?
When you start your starter, don’t expect to be making bread with it for at least a week. Maybe two. You’re growing something, and it takes time! So start this little project during a two-week period when you won’t be going away for the weekend or anything. It’s a simple process, but it has a lot of down time where you’re waiting for the yeast to come alive.
Once you get past that initial period, you can relax a bit, storing it in the fridge if you need to ignore it for a week or two.
Once your starter is alive, you can have sourdough bread in about a day and a half, start to finish, if you keep your sourdough starter at room temperature. (Don’t worry, you’re not actually working on the bread all that much; most of that is passive time while the dough does its thing.)
Making sourdough starter


What follows is basically everything I know about growing your own sourdough starter. It’s a lot. So, I’ve also put the basics at the bottom of the post, like a recipe. But don’t just skip down there! Read the whole thing at least once, if this is your first time making a starter.
What do you need to make sourdough starter from scratch? Let’s gather our supplies. The list is really short.
Sourdough starter ingredients
Flour
Technically, you can grow sourdough starter with any refined or whole-grain flour. You can even start your starter with one flour and then feed it later with a different flour.
I grow mine with a 50-50 mixture of whole wheat flour and bread flour. Why? Because that’s what the Tartine Bread book told me to do. Supposedly, whole wheat flour grows wild yeast the easiest. I have no idea if this is true or not.
I will say that I’ve never ever, not once, had a homemade starter fail on me. I’ve heard stories from friends of moldy disasters, or starters that just wouldn’t bubble. I have never had these things happen to me. Is it the mix of flours I use? I can’t prove it, but I will keep using them. (I do want to try rye flour someday, because I think that would be delicious, but I’ve read that it’s the most difficult starter to make a good sourdough bread with, so if you’re a beginner you might want to skip the rye for now, in order to ensure the best results.)
Whichever type of flour you decide to use, make sure you’re using fresh flour! The only thing we want growing in the flour is natural yeast. Storing your flour in a clear container is a good idea. Give it a shake and make sure you don’t see anything moving around.
If you do choose to use a 50-50 mixture of whole wheat and bread flour, I suggest you mix it up in a big container. That way, you don’t have to worry about adding an equal part of each flour for every feeding.
If you want to do a 50-50 mix but don’t normally have bread flour on hand, the whole wheat flour is the important one, so go ahead and use all-purpose flour in place of the bread flour. But if you want to make those classic, crusty loaves, you’ll be buying bread flour eventually.


Water
I make my initial mixture with warm tap water, and feed my sourdough starter with cold-ish filtered water from the dispenser in the door of my fridge.
You can use tap water for feedings as well, but if you find yourself unsuccessful at growing a starter, you might want to try filtered, or even bottled water. I have read that chlorinated water can affect your starter. I don’t know if this is true.
I fed my first starter (the one I bought) with bottled water for years, because I’d read that I had to (I have no idea where, it was a decade ago). This was kind of a pain, because I don’t really drink bottled water.
Then, one day I needed to feed my starter, and was out of bottled water, so I had to use filtered water. And my starter was just fine! And I’ve been using filtered water ever since.
NYC water is really good, so I could probably just use tap, but eh, why mess with success?
And that’s it for ingredients! Flour and water. But you do need a (very) few materials as well.
Materials
Clean jar or bowl
You do not need any kind of special container to grow sourdough starter, despite all of the cute sourdough containers you might find online (don’t let me stop you from buying one, I love cute containers! You just don’t need one).
You need a bowl. Like, the kind you eat your cereal or soup in. That’s it. And it does not have to be big. It should hold at least about two cups. Bigger is fine.
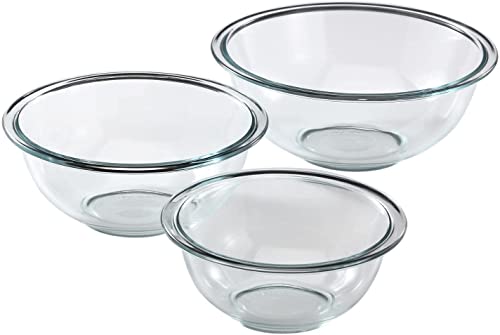
If you have a clear glass bowl you want to use, like a small Pyrex nesting mixing bowl, it will give you the advantage of being able to see how bubbly things are getting from the side. But it’s not necessary.
Glass jars also work great, like canning jars. But you don’t want to use any kind of lid at this stage, just the jar.
Is there any container you should stay away from? I often see people growing their starter in a plastic deli container, and I don’t know why. I would stay away from those. It can be difficult to get oily food residue off of plastic, so stick with the dishes you use to serve food. (Of course, I know plenty of people who do just fine with plastic deli containers. I’ve seen and smelled their starters, and they’re wonderful! But we’re trying to maximize your chances of success here.)
How many bowls?
Now, how many bowls do you need? That is entirely up to you.
Sometimes I just keep using the same bowl for a few days in a row. It will look a bit messy, because some starter will harden and stick. But that won’t hurt anything.


Usually, though, I move my starter to a new bowl for each feeding. I don’t know why. There is no advantage to this. But I do it anyway! (If you saw my kitchen right now you’d laugh that I would care about one bowl being neat and tidy.)
Kitchen towel
When you first start growing your starter, you don’t want to cover it tightly. You want to give the microorganisms floating around in the air the chance to get in.
I use a kitchen towel in the early growing stages. I lay it on top of the bowl, or sometimes I secure the edges under the bowl.


But if you don’t have one, you can also use a double-layer of paper towels, held onto the bowl or jar with a rubber band.


Whichever you use, make sure to tell family members what you’re doing, so that they won’t knock the bowl over. (Don’t worry, the starter was fine.)


Food scale
This one is optional, but I highly recommend using a food scale for this, and for all baking, really.
Not only will you be able to measure things like flour more precisely, you won’t have a bunch of measuring cups to wash!
I have this scale. According to Amazon, I’ve had it since 2009. And it’s still going strong!


It has everything you want in a food scale:
- It can switch between grams and ounces with the push of a button
- It has a tare function, which lets you set the scale back to zero at any time, even with weight already on the scale (the most important feature for a kitchen scale)
- The display pulls out, so that you can put a baking sheet or other large items on the scale and still be able to see what you’re doing
- The platform pops off for easy washing
- It uses regular old AAA batteries
- It has a backlight (that I have never, ever used—who bakes in the dark?)
If you don’t use a food scale for your starter, you can add the ingredients by feel (in fact, the initial mixture is done totally by feel). But if you want to be serious about bread baking, you should get used to measuring your ingredients by weight. (Everything in the Tartine Bread book is by weight!)
If you do have a food scale, go ahead and weigh the bowl you’re going to use, and write the weight down somewhere. You can use ounces or grams, up to you (I use grams). That way, if you want to leave your starter in the same bowl for a feeding, you’ll be able to subtract the weight of the bowl and know just how much starter you have. (That sounds confusing, but I’ll explain it when it’s time.)
And that’s it for supplies! Now, we just need a little time.
Mixing your starter
Day 1
It’s good to start in the morning. Eventually, you’ll be feeding your starter every day at the same time. Because you want to start making your bread the night before with starter that was already fed and given a chance to rise, it makes sense to do the regular feedings in the morning or early afternoon.
Run your tap until the water feels very warm, but not hot (you should have no trouble holding your finger under it; if in doubt, cooler is better than hotter, because water over 110 degrees could kill the good bacteria we’re trying to use!). Put about a half cup of this warm water in your bowl.
Add a handful of flour and mix it with your fingers. The goal is to have a thick batter, with no lumps, so add a little more water or flour as needed.

Wet your finger and clean off the sides of the bowl, which will be dirty from the mixing.
You don’t necessarily need to find a warm place to keep your starter, but it shouldn’t be in an especially cool place either. And it definitely shouldn’t be in direct sunlight.
Cover the bowl with your kitchen towel (or paper towels and rubber band), and walk away. For two days. Seriously. Don’t touch it. Don’t lift the towel, don’t peek. Just leave it. Let it do its thing.
Take a look!
Congratulations on your restraint! Now you can look.
Take off the covering, and peel back the crust that will have formed on top (you can throw that crust out).


Are there bubbles?? YES!! Look at those gorgeous bubbles! IT’S ALIVE!!!
Now smell it. It should smell like ripe cheese. This is a good thing!
If there are no bubbles, cover the bowl and check again the next day. (If your kitchen is especially cold, you might even need one more day after that.)
If there aren’t any bubbles by the fourth day, you’ll have to start over. Congratulations, you have the cleanest, most bacteria-free environment ever!
Feeding sourdough starter
The first feeding
Once you have bubbles, it’s time to start feeding your starter.
First, get rid of about 75% of the starter.
WHAT? I just spent two days growing those beautiful bubbles, and now you want me to get rid of most of it?
Yes. It’s like when you plant three seeds in a hole, and they all sprout, and you have to get rid of two of them. It seems like a waste, but you have to do it so that what’s left can thrive. Throw out three-quarters of the starter.
Now, if you have a scale, this is where the scale comes in.
Feeding by weight


If you want to start with a clean bowl, go ahead and put it on your scale, and then zero out the scale. Add the one-quarter of your starter that you saved, and make a note of how much it weighs. You can use ounces or grams, up to you. Just be consistent, or you’ll have to do math (FYI, there are 28 grams in an ounce, which you’ll only need to know if you can’t decide on which to use!).
If you want to use the same bowl that your starter has been getting busy in for the past few days, you’ll need to know how much the bowl weighed when it was empty (I told you to weigh it back when we were discussing supplies!). Weigh the bowl with the remaining one-quarter starter in it, and subtract the weight of the empty bowl from that number. That’s how much your starter weighs! So, for example, if the empty bowl back on day one weighed in at 120 grams, and now with the remaining starter it weighs 162 grams, you know that you have 42 grams of starter (162-120).
Now, add an amount of flour equal to the weight of your remaining starter. So, if your starter weighs an ounce, add an ounce of flour. If it weighs 42 grams, add 42 grams of flour.
Then, add the same amount of water, also by weight. So if your starter weighed an ounce, add an ounce of water (just to be clear, you could also add a fluid ounce of water by volume, which amazingly also weighs an ounce!! Another reason to get a scale).
Mix this up with your fingers until all of the lumps are gone. Again, it should be a thick batter, just like the first time.
Clean up the sides again and cover it with your towel or paper towels, and leave it until the next day.
Feeding by feel
If you don’t have a scale, you’ll be guestimating a bit. Just like the first time, the goal is to end up with a thick batter.
Add a handful of flour to the one-quarter starter you kept. By volume, you’re going to be adding about twice as much flour as starter. So if your remaining starter was two tablespoons, add about four tablespoons of flour.
Add a little water, and start mixing with your fingers. Add a little more water, until you get that nice, thick batter. (Measuring the water really isn’t necessary; as long as you’ve got the flour right, you add water until you have a thick batter. But if you really want to measure it, the water is about 1.5 times the volume of the starter. So for that two tablespoons of starter, you would add about 3 tablespoons of water.)
Cover it up again, and leave it until tomorrow.
No matter which method you use for measuring the flour and water, trust me: after a few days, you won’t bother with either. You’ll just know how much to add.
More feedings
You’re going to repeat that same feeding process every day, at roughly the same time. I like to feed mine in the morning, when I first come downstairs. My starter eats before I eat, that way I don’t forget.
So every day, you’re going to discard three-quarters of your nice bubbly starter, and then add flour and water, in weights roughly equal to the remaining starter.
And you’re going to start paying attention, with your eyes and your nose.
At this point, since I know that my starter is alive, I usually switch from a towel or paper towel covering to regular old plastic wrap, since we’re no longer depending on wild bacteria to find its way into the bowl. Plus, then I don’t have to peel back a crusty layer of starter every morning.
The life cycle of sourdough starter
When you first greet your starter in the morning, what does it smell like? It should smell sour or vinegary. That’s because it hasn’t eaten in a day, and it’s hungry. It’s also at its lowest point, volume-wise.
Right after you feed it, it should be nice and thick. See how this hasn’t even settled flat yet?


Check it again five or six hours after you’ve fed it. Has it grown? Does it smell different?
Look how much higher this is! And look at all the bubbles!! If you could smell it, it wouldn’t really smell like vinegar anymore.


By the next morning, it has thinned out, and settled back down. You can see how much lower it is compared to the high-water mark on the bowl. It smells very sour now, and needs to be fed again. If you stir it, it might even seem watery.


After a week or so, it should be behaving in a predictable manner. It will be small and sour in the morning, and then by the afternoon or evening, hours after a feeding, it will expand. Then it will slowly start to fall again.
Once it’s doing this every day, you have an active starter, and it’s ready to use! Go forth and find a recipe. (I’ll add one eventually, but they’re everywhere. You’re looking for a recipe that calls for fed sourdough starter. That means you fed it, and gave it a chance to expand, and it’s at or near its highest point.)
Keeping sourdough starter at room temperature
If you think you’re going to be baking frequently, you can maintain your starter on your counter. Just keep doing that discard-and-feed routine every morning. It should be a relatively warm spot (so in winter, not near a window), but not hot (don’t keep it next to the stove!).
You can keep doing this forever, but at some point you may want to store your starter in the fridge.
What if you forget to feed it?
Listen, it happens. I’ve forgotten to feed my kids more times than I can count, and I have definitely forgotten to feed my sourdough starter.
Feed it as soon as you realize you forgot. And try not to forget again. Set an alarm on your phone. Put the starter in front of your coffee maker. Whatever will jog your memory every morning.
As long as you don’t leave it for so long that the bacteria eat up every last little bit of food, you should be able to bring it back to life with a feeding.
Storing sourdough starter
If you’re going on vacation, or just won’t be baking for a while, you can store your starter in the fridge. Yes, it’s a living thing, but the cold doesn’t kill it, it just slows it down.
You can just store it in the fridge in the same bowl you use on the counter, with some plastic wrap on top (we don’t want it to dry out too much between feedings).
Personally, I store my starter in one of those old-timey hinged jars, but I take the rubber gasket off. Gas could build up inside if you left it long enough, and you don’t want the top to pop off! So whatever you use, make sure it is NOT an airtight container.
Closing the lid without the gasket on is perfect. It lets a little gas escape, but isn’t so loose that your starter dries up.
This would also be the time to use one of those cute sourdough jars I mentioned.
How much to store?
You also might want to store more starter in the fridge than you would on the counter. Why? Well, for one thing there’s no reason not to. The only reason we store such a small amount on the counter is that we waste so much flour feeding it each day. The less we keep, the less we need to feed it.
In the fridge, though, we’re not feeding it anywhere near as frequently, so we might as well keep a larger amount of starter. Plus, there are some recipes that use straight-from-the-fridge, unfed starter, so if you want to use those recipes, you need a bit more starter stored up.
In order to do this, when you’re ready to store it, don’t discard three-quarters of it. Discard half of the starter, or a third, or none at all! Just make sure you feed it with an equal amount of flour and water, so that it doesn’t starve in the fridge.
If you don’t want to store more, though, you don’t have to. You can just store a little bit, enough to keep it going.


Feeding stored starter
You should feed your refrigerated starter every week to ten days. Two weeks, max, if you can help it.
Take the starter out of the fridge and let it sit for about an hour, to come to room temperature and wake up a bit.
Do the normal discard-and-feed routine, getting rid of three-quarters and adding more flour and water.
Cover the container (or close the lid) and let it sit out for another hour or two, until it’s getting bubbly again.
Return it to the refrigerator for another nap.
What if you forget to feed refrigerated starter?
Let me tell you about the time I forgot to feed my refrigerated starter for more than two months.
It was not pretty.
Literally, it was not pretty. There was about an inch of black liquid on top. I have a picture somewhere. If I ever find it, I’ll add it here. It’s gross.
If that happens to you, pour off that liquid into the sink. Mix up the starter. Follow the usual instructions for letting it come to room temperature, and then feed it.
If it gets bubbly a couple hours after its feeding, you saved it!
A good starter is hard to kill when it’s kept cold, but don’t press your luck.
Waking up refrigerated starter
If you want to use your starter after it’s been stored in the fridge, you have to get it back to how active it was when you were keeping it on the counter. This takes a few days, so start a few days before you want to start the baking process.
To do this, we’re going to just take a bit of the starter out of the fridge and wake it up, not the whole container. You can continue storing the starter in the fridge, and just take out what you need for baking.
Take about one-quarter cup (about 60 grams) of starter out of the fridge and put it in a bowl. Cover it with plastic wrap and let it come to room temperature.
Add equal parts flour and water to make a thick batter. Cover it, and let it sit at room temperature for about twelve hours.
Feed it two more times, twelve hours apart, discarding all but one-quarter cup (or 60 grams) each time.
Now it should be nice and active!
So that’s it, that’s everything I know after more than ten years of working with starter, and six or seven of growing my own. Get that starter going, and while you’re growing your starter, I’ll work on some posts about actually using it to bake something! And before you know it, you’ll be baking something like this.


Sourdough Starter Recipe


To make delicious sourdough bread that rises high and has lots of big air holes, you need an active sourdough starter! Making one is easier than you think, and uses just two ingredients.
Ingredients
- Approximately 1 cup flour (preferably a 50-50 mix of whole wheat and bread flours)
- Approximately 1 cup water
Instructions
Make the sourdough starter
- Put about a half cup of warm water (105°F) in a small bowl
- Add a handful of flour and mix with your fingers until no lumps remain
- Add a little more flour or a little more water until the mixture has the consistency of a thick batter
- Clean the sides of the bowl with a wet finger
- Cover the bowl with a clean kitchen towel, or a double layer of paper towels secured with a rubber band
- Set aside somewhere not too hot or too cold for 2 days
- After 2 days, peel back the layer of crust and look for bubbles; if there are no bubbles, cover the starter and check again in a day
- If there are bubbles and the mixture smells very ripe, it's time for the first feeding
Feed the sourdough starter
- Discard 75% of the starter
- Add a handful of flour to the remaining starter (an equal amount by weight)
- Add enough water to make a thick batter (again, an equal amount by weight)
- Mix with your fingers until there are no lumps
- Cover and set aside until the next day
- After a few days of daily feedings, check the starter about 5 or 6 hours after feeding; if the starter has expanded and is very bubbly, the starter is ready to use
- Continue to discard 75% of the starter each morning before feeding it
Maintaining the sourdough starter in the refrigerator
- If you want to store the starter in the refrigerator, take it out every week or so for a feeding
- Let the container of starter sit at room temperature for an hour or two
- Discard 75% of the starter and feed the remainder
- Let the fed starter sit out at room temperature for an hour or two more, until the starter is bubbly
- Cover and return to the refrigerator
Recommended Products
As an Amazon Associate and member of other affiliate programs, I earn from qualifying purchases (but you won't pay anything extra!)


Britt K
Monday 22nd of June 2020
I have seen a lot of friends posting on Facebook recently about their sourdough starters and I would be lying if I said that I wasn't intrigued, however, I hadn't looked up any details to actually get started myself. It always sounded like it would be far more complicated than this! Now that I've seen it's actually relatively simple, I think I need to give it a try.
Amy
Saturday 6th of June 2020
Oh, forgot to mention, I keep another jar of discard so enough is around when I want to use it. It still gets a bit bubbly.
Amy
Saturday 6th of June 2020
Interesting! I follow the King Arthur flour guidelines, which are a little bit different than yours, but not much. For one thing, depending on how much I need, I don't always wait a full 12 hours to use it, usually 2-3. Works fine. I've also been making some great stuff with discard - soft pretzels, waffles, a great soft olive loaf. Only been doing this since March (yes I'm one of those people), but really loving it! I will definitely be reading the book you recommended. Thanks!
Nancy
Thursday 4th of June 2020
Best,most accessible explanation EVER. Next I'm 100% doing this next fall. Love this post.
Amy Oztan
Thursday 4th of June 2020
OMG, that is EXACTLY the reaction I was hoping for! Thank you!!