My Cake Pop adventure
This post may contain affiliate links and/or codes. You won't pay anything extra, but I might make a commission.
Latest Post: How to Be a Good Dinner Party Guest
So I'm not sure when I first got it in my mind to make cake pops. It might have been after I brought a couple of really beautiful NY Cake Pops home for the kids from an event, and they raved about them. It might have been when I spent an hour searching for the perfect cake decorating book on Amazon and discovered that cake pops were taking over. Or it might have been the moment I decided to do Slim-Fast and my inner demon said "Cake pops. Cake pops!"
Regardless, I decided to do it, and in true "me" fashion I ordered a bunch of supplies before making even one batch. I ordered a big Styrofoam block to let them dry on, a plastic display stand for serving them (to whom, I had no idea) and little bags and gold twist ties to wrap them in.
But then over the weekend, before any of that stuff had arrived, Fiona and I decided to jump in and make some. I had a layer of yellow cake in the freezer that I hadn't used because it was really lopsided, so I put Fiona to work breaking that into crumbs.

I wanted to have some kind of vanilla/chocolate flavor contrast, but didn't have any vanilla frosting to mix with the crumbs (and just didn't feel like making any), and only had dark chocolate melting chocolate, so I just used those. Fiona mixed everything up by hand - literally - and I took out my new Wilton chocolate melter (which is awesome, by the way).

Fiona made the pops many different sizes, and as much as I wanted to correct her I was also curious as to which size would work best (we discovered that if you make them too small, they fall apart when you put the stick in). We put those in the fridge for an hour.

Then we dipped our sucker sticks in the melted chocolate, stuck them halfway into the pops, and put it all back in the fridge for another half hour.

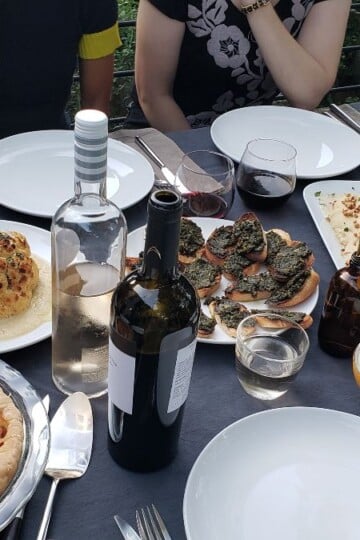
Jake came over to help dip (yeah, he's the kind of "helper" who shows up for the fun part and then disappears) and they decorated the pops with chocolate chips, colored sugar, and sprinkles.


We let them sit until they were dry to the touch, then we tried them and oh my GOD they were good. I mean, how could they not be? It's frosting and cake dipped in chocolate. The next step was to make them look good. And I'm sorry to say, I had to do this without Fiona. Don't get me wrong, the kids' turned out really cute, but I get annoying with this stuff. If I can't make it look professional I'll just buy it from someone who can.

The only additional supply that had arrived was the Styrofoam block. I covered it in packing tape, got out a ruler, and poked sixteen holes on one side and twenty-five holes on the other (for different sized pops). I put some foil over the top to catch drips. Eventually I think I'm going to get a wood block and drill holes, but who knows when I'll get around to that. If someone could just sell me one that would be fabulous.
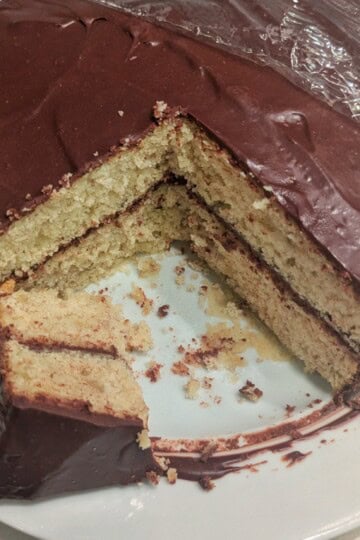
I made a 13x9x2" devil's food cake from a mix and let it cool completely, then I put it in my stand mixer and mixed it up until it was in pieces. Since the cake was nice and moist it didn't really get to a crumbly stage like the other one had, but it did get to the point where there were no big pieces.


I added canned chocolate frosting a spoonful at a time until the cake was the consistency of soft Play-Doh (I ended up using ¾ of a cup).

Now, here's the part where you'll start to suspect that I'm a little crazy, but I got out my trusty Oxo kitchen scale and weighed out cake balls 30 grams each. Trust me: if you want to make things a uniform size nothing is as easy as weighing them. The key is to have a scale that can weigh in negative numbers, so that you just keep taking the dough out of the bowl until you've reached 30 grams. So much better than eyeballing it.

Once balled up, I put the pan in the fridge for half an hour to chill. About half way through that I pre-heated the Wilton chocolate melter and melted some chocolate, stirring frequently. Then I switched it to the "warm" setting and got the pan from the fridge.

I dipped each sucker stick into the chocolate and pushed them about halfway into the cake balls. I've checked out a few sites over the past few days for cake ball advice and even though most of them advised putting the balls back in the fridge before dipping, I didn't. I let them sit for about fifteen minutes to let the sticks set, then got to dipping. (It's worth noting though that by the time I got to the last ten, I had to put them back in the fridge - they were totally warm and mushy. So depending on how fast you work, you may or may not have to cool them down again.)

It took me a while to get my technique down so that they came out smooth, but here's what I ended up with after making about a dozen uglier ones: I dip the ball in and immediately (but gently) tap the stick against my finger to get off excess chocolate. This leaves the chocolate a little lopsided, so I twirl the ball slowly while letting the rest of the excess drip towards the stick. Once the chocolate stops moving and starts to set I put the stick into the Styrofoam.


After about half an hour the cake balls were dry, and I drizzled them with white chocolate. Another fifteen minutes and they were stable enough to be laid down again without wrecking the chocolate. Ideally I would have put them into my new plastic stand, but it isn't here yet!

Some sites have said to refrigerate them at this point, and some said they would "weep" - that the moisture would escape from the insides and things would get ugly. These are going to my son's classroom tomorrow for their Thanksgiving feast, and since I routinely leave frosted cake or cupcakes out for forty-eight hours, I think these will be fine too.
I can't wait until the white dipping chocolate I ordered gets here, because that's when the fun will begin. Even though I'm not a huge fan of white chocolate, coloring it does make the cutest cake pops.
Now that I've got my dipping technique down I want to try something more complicated, from a booklet I was sent to review, Cake Pops & Mini Treats. I need a few more supplies though. Yay, more shopping!
While making these look good is certainly harder than making them taste good, this was a great project for Fiona and me to do together, and I can't wait to make them with her again. And I promise not to critique her technique. :-)

I visited the following sites to learn the basic techniques for making cake pops:

They look awesome, great 'hand out to class' idea for bdays.
@Mother Bear: Totally! The kids went crazy for that batch - they've been asking Jake when I'm bringing more in. :-)
Cake pops are "da bomb" for sure. Excellent activity for all in the family.
Great post, Amy
those look soooooo yummy! I have never tried this before, but I'm so willing to try though!
:)
My kids are loves cake pops so much! I can relate to your adventure. Thanks for this great post!
The idea is as delicious as your cake. It looks like your kids are having fun making them. This is the first time I saw this idea and I can't wait to see my kids' reactions to them.
Those cake pops look delicious ... sort of like the ones you gave me. Left them on the kitchen counter and kids and Big P ate them all. I'm not bitter.
Impressive! Drooling here :) No I need to go buy some this weekend. Wishing you a very happy Thanksgiving! :)
I am so happy i found you via your tweet! My 2 and 4 year old LOVE cake pops. I am totally going to try making them now. Naturally using your step by step post! Thank you for sharing. I live under a rock apparently because i am not sure who Hugh is....but i love cake pops.
@Jennifer: Wait, Hugh Jackman? From X-Men and Australia? Tony Award winner and Tony Awards host? Cake Pops pale in comparison to getting you up to speed on the most charming actor on the planet! (Assuming George Clooney is vacationing on Mars.)
My favorite Aunt has promised me this
http://www.amazon.com/Babycakes-CP-12-Cake-Maker-Purple/dp/B0050JRZR2/ref=sr_1_1?s=appliances&ie=UTF8&qid=1322008781&sr=1-1
For Christmas so I can just back the batter directly in ball shape and skip the whole crumbling the cake up step. I also heard you can bake premade from the roll cinnamon rolls cut into quarters and make Cinnabon bites in 4 minutes! This will be my new quick and easy breakfast for the kids!
@Snarky_Momof2: I'm very curious about those and was thinking of getting one to test out. I'm guessing it would be a totally completely different thing, more like a cupcake or light doughnut on a stick than a cake pop. The cake pops are thick and fudgy and so different from cake.
Pictures of my past attempts are here:
http://www.facebook.com/media/set/?set=a.326416350705853.100690.100000124736536&type=1&l=4743eacc0c
This is my favorite Cake Pop recipe:
Cake Ball Mix
What you need
1 batch Dark Chocolate Cake
8 ounces cream cheese, softened
2 cups confectioner's sugar
4 tablespoons butter
1 tablespoon milk (or more, as necessary)
Bake the cake and let it cool completely on a rack. This is a very moist cake, which is ideal for this recipe. It's best to let it cool overnight at least. When it is completely cool, break the cake into a large bowl. Crumble it with forks or your fingers until it is in fine crumbs.
In a separate bowl, whip the cream cheese, butter, powdered sugar, and milk together until smooth. Pour into the cake crumbs and mix with a spoon. Then continue mixing with your fingers, kneading and mixing until fully incorporated into the cake. Check to see if it will roll into a ball. It should: this makes a very malleable, easy-to-handle cake mixture. But if it needs a little extra moisture, add milk a spoonful at a time.
When the mix is completely done, cover with plastic wrap and refrigerate until firm. You can leave the mix refrigerated for several days at this point. I left mine in the fridge for about three days before making the balls. You could probably also freeze this.
@Snarky_Momof2: Those pictures are great! And I love cream cheese anything, so I just may try that recipe. Thanks for posting!
As a huge Bakerella fan, I tried to make cake balls for my son's kindergarten graduation party a few years ago. I cheated with them instead of the pops since they are easier to transport. I have not tried them again because the colored chocolate was a mess. Burned it, couldn't melt it, no matter what method. This is where I smack myself for not taking out the fondue set that we have had for 11 years and never used. Now I really, really, really, want to try making them again. Thank goodness TechyDad just told me where the fondue set is so I can try it soon. My goal is to make some fun Disney ones down the road.
@Beth @ TheAngelForever: Please please check back and let me know how it works - I'm betting there are a lot of people with fondue sets gathering dust who would love to know that they could be used for something!
I am so impressed! I'm also super jealous that you got to interview Hugh Jackman-I just saw him on Broadway and cannot stop raving about him!
@Beth B: OMG, I saw his show a couple weeks ago! It was amazing! I've never seen ANYONE work an audience like that.
Oh and I should add I have a recipe that calls for cream cheese instead of frosting and I have found those are much more moist and hold up better during dipping.
@Snarky_Momof2: Just plain cream cheese? Oh I have to try that! I love cream cheese anything!
I made some at the beginning of baseball season last year that looked like baseballs. I dipped in white chocolate and then added some red icing to look like laces. It was the hit of the season. People kept asking me to do it again! Super easy treat and much cheaper than hitting the league owned snack bar after the game!
@Snarky_Momof2: Oh that's a great idea! Do you have any pictures? One of the ones I brought home from NY Cake Pops was a soccer ball - it was adorable! My next purchase is going to be the edible pens, I think I read about those on Bakerella.com.
Thank you, your step by step directions were very helpful. My daughter and I have tried these a few times, with limited success. I think the key is to make them the consistency of soft playdoh. I think we will try them again thanks to your help!
@Shelly: My pleasure! And yeah, if you look closely at the first batch that my daughter did with me, I don't think we had enough frosting in there - they were too dry and it was hard to roll them into really smooth balls.