How to Make a Baked Chickpea Turkey, for a Homemade Vegetarian Thanksgiving
This post may contain affiliate links and/or codes. You won't pay anything extra, but I might make a commission.
Latest Post: How to Be a Good Dinner Party Guest

A baked chickpea turkey is a fun way for vegetarians to celebrate Thanksgiving! It can be the centerpiece of a veggie Thanksgiving, or a thoughtful main course for a vegetarian guest.

A Vegetarian Thanksgiving

When I was growing up, my whole family was vegetarian (they aren't now - I'm the only one who still is). Every Thanksgiving my mom would make a vegetarian turkey out of chickpeas. She was kind of famous for it, because it was so weird! She would mix chickpeas in a blender with flour and some spices and bake it up on the back of a casserole dish, then shape drumsticks and wings, and bake those too. The whole thing sat on top of a mound of delicious stuffing.
It was comical, but also really sweet! Even though we were vegetarians, we had a turkey to carve and some drumsticks to fight over, just like everybody else. (Since she actually made the drumsticks and wings, sometimes she made three of each so that my sisters and wouldn't fight.)
This year I decided to make my own chickpea turkey for Thanksgiving dinner. I'll still be making an actual turkey, too. I'm surrounded by meat eaters on Thanksgiving. But I love the idea of having my own main course!
Since I'd never done it before, I made a "test" meatless turkey last week.

Actually, I ended up making three test turkeys. I tried baking the first one over the back of a casserole dish like my mom did, but I couldn't get it to stay in one place. I was afraid that it would stick to the bowl if I didn't put oil on it, but the oil made it slide down to the bottom as it was baking-when I took it out of the oven it looked like a rumpled Christmas tree skirt. My mom never seemed to have this problem, but my chickpea batter is different than hers. So I needed a new plan.
I love non-stick aluminum foil so much, I don't even buy the regular stuff anymore (if for some reason I need "regular" foil, only one side is non-stick). So I covered the bowl with the foil (dull side up-that's the non-stick side). That worked OK (it didn't stick!), but I had trouble getting the chickpea dome off of the bowl and onto a pile of stuffing in one piece. Plus, the side that was up against the foil (the part that would be against the stuffing) wasn't cooked as well as the outside. There had to be an easier way!
And that's when inspiration hit.
The third try was the charm. I made my batter a bit thicker, and instead of spreading it on the outside of the casserole dish, I spread it on the inside!
The thicker batter was also easier to form into legs and wings. You need two of each.

You want to line your baking sheet with parchment paper, and spread or spray a little olive oil on it, so that they don't stick. I use this for my oil.

You could try to form the batter into the parts of the wing, or you can do what I did and take the easy way out: bake the batter in an oval shape, and then cut it after it's baked.

If you really want to be extra, you could even try to form it into the three separate shapes of a wing (the drum, the flat, and the tip). I might try that next time.
When it was done cooking, I was able to fill it with the stuffing, turn the whole thing over in one piece, and put it back in the oven to crisp up the other side. Perfect!

Well, almost. This is what my plant-based turkey looked like after I'd put the legs and wings on with toothpicks. Hmmm.

Something was wrong.

I looked at it for several minutes before I spotted it.

The legs and wings were on backwards!
There, that's better.
Vegan Thanksgiving Turkey
While I'm not vegan it would be very easy to turn this into a vegan recipe. The only non-vegan ingredient is egg, so just use your favorite egg substitute.
Dress it up!
These were just tests, I wish I had pictures of the real one that we had on Thanksgiving (bad blogger!!). You can dress the plate up with some traditional thanksgiving side dishes, like roasted brussels sprouts or butternut squash, to present it more like a real turkey. Use some bright colors to break up the brown of the chickpeas. Even just putting it on a bed of curly kale would look great on your Thanksgiving table!
Serve it with green bean casserole cranberry sauce, mushroom gravy, and a pumpkin pie for the full Thanksgiving meal experience. You can even make little frilly paper booties that some people use to cover the leg bone that sticks out from the drumsticks.

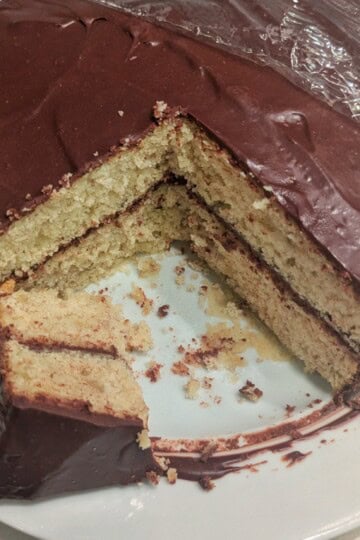
When you're ready to serve, just remove the legs and wings (watch out for the toothpicks!), and slice it like a cake, getting stuffing and chickpea mixture in each slice.

And that's it! Happy Vegetarian Thanksgiving.
Recipe Card
Vegetarian Baked Chickpea Turkey Recipe
A baked chickpea turkey is a fun way for vegetarians to celebrate Thanksgiving! It can be the centerpiece of a veggie Thanksgiving, or a thoughtful main course for a vegetarian guest.
Ingredients
- 8 ounces red or yellow potatoes, or sweet potatoes, peeled and quartered
- 1 small yellow onion, roughly chopped
- 1 can chickpeas, rinsed and drained
- 1 egg
- 1 carrot, peeled and shredded
- 1 cup all-purpose flour
- 2 garlic cloves, minced
- 1 teaspoon ground cumin
- 1 teaspoon ground coriander
- ½ teaspoon salt
- ½ teaspoon ground black pepper
- Olive oil for frying
- 1 recipe Easy Vegetarian Stuffing (below—you should make it ahead of time), or one package of stuffing mix, prepared according to package directions (you can make that while the "turkey" is cooking)
Instructions
- Preheat oven to 350 degrees
- Boil potatoes in salted water until cooked through; drain and mash with a fork
- Put onion and chickpeas into blender or food processor, or use an immersion blender, and blend until no big pieces remain
- Add the egg and blend until you have a smooth paste
- Put the chickpea mixture into a large mixing bowl and add shredded carrot, mashed potatoes, flour, minced garlic, cumin, coriander, salt, and pepper
- Stir until completely combined
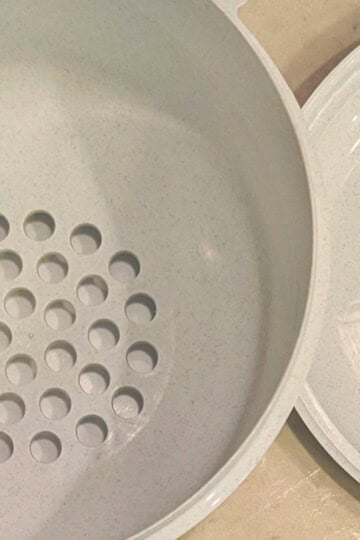
- Put a casserole dish or oven-safe Pyrex bowl on one end of a parchment-lined baking sheet, and line the inside with non-stick aluminum foil, with the non-stick side facing up (usually the dull side)
- On the other end of the baking sheet, brush or spray some olive oil onto the parchment paper
- Using a few tablespoons of batter for each, form two legs and two ovals, and place them on the olive oil-lined part of the parchment paper
- Gently press the rest of the chickpea batter into bowl, until the inside of the bowl is completely covered and the batter is about ⅓-inch thick (you might not use all of it)
- Brush or spray the exposed batter with olive oil
- Bake for 45 minutes to an hour; "turkey" is done when it is cooked through and browning, and feels crispy (the legs and wings might take a little longer than the "turkey" if they're much thicker)
- If you made the stuffing ahead of time, take it out of the refrigerator to bring to room temperature while the "turkey" bakes, and either cover it with foil and heat it in the oven while the "turkey" cooks, or heat it in the microwave
- Remove the "turkey" from oven and carefully peel the drumsticks and wings from the parchment paper; cut a skinny "V" out of each oval to make them look like wings; cover the shapes or wrap them in foil to keep them warm
- Increase oven temperature to 400 degrees
- Fill the "turkey" to the top of the bowl with the warm stuffing, pressing down gently
- Place an oven-safe plate on top of stuffing and carefully invert the bowl onto the plate
- Carefully remove the bowl, and then peel the foil off of the "turkey"
- Brush or spray some olive oil on the exposed part of the "turkey"
- Put the "turkey" back into the oven for 20 minutes, to cook what is now the outside of the turkey
- Remove the "turkey" from the oven, and stick the legs and wings on with toothpicks.
- Serve immediately
Notes
If you want to do most of the work before Thanksgiving day, you can make the chickpea dome and legs/wings, fill it with the stuffing, cover the bowl, and refrigerate.
On the day you want to eat it, take the "turkey" out of the refrigerator, turn it over onto an oven-safe plate, remove the bowl, and let it come to room temperature, about 45 minutes; meanwhile, preheat the oven to 350 degrees.
Remove the aluminum foil and bake for about 45 minutes, until the chickpea batter is browning and the stuffing is hot (you can check it with an instant-read thermometer—it should be about 160 degrees in the middle).
To make this recipe vegan, substitute your favorite egg substitute for the egg in the chickpea mixture. My vegan stuffing recipe is at the bottom of this post, after the vegetarian version.
Recommended Products
As an Amazon Associate and member of other affiliate programs, I earn from qualifying purchases (but you won't pay anything extra!)


Nutrition Information
Yield
6Serving Size
1Amount Per Serving Calories 254Total Fat 7gSaturated Fat 1gTrans Fat 0gUnsaturated Fat 5gCholesterol 31mgSodium 404mgCarbohydrates 40gFiber 5gSugar 3gProtein 8g
Nutritional information is an estimate only, and is just for the chickpea turkey, not the stuffing.
Recipe Card
Vegetarian Stuffing Recipe, with Gluten-Free Option
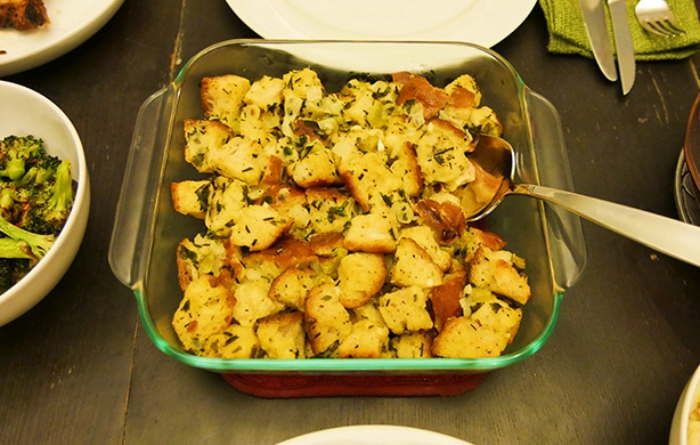
This stuffing is so good, even carnivores won't miss the meat. Plus, you can make it up to two months in advance if you want to make things a bit easier on Thanksgiving Day!
Ingredients
For prep day:
- 1 lb loaf of good-quality white or sourdough bread, torn or cut into 1-inch cubes (to make this recipe gluten-free, use gluten-free bread)
- 16 tablespoon salted butter
- 3 cups yellow onions, roughly chopped, about 1 pound before peeling and chopping
- 2.5 cups sliced celery, about 4 large stalks, sliced ¼-inch thick
- ½ cup chopped fresh parsley leaves, about 2 ounces before removing stems
- 2 tablespoon chopped fresh sage
- 2 tablespoon chopped fresh rosemary
- 1 tablespoon chopped fresh thyme
- 2-3 large garlic cloves, roughly chopped
- 1 teaspoon kosher salt
- ½ teaspoon ground black pepper
- 1 cup vegetable broth
For baking day:
- About ½ tablespoon butter for the baking dish
- 1 cup vegetable broth
- 2 large eggs
Instructions
Do first, before vegetable/herb prep:
- Preheat oven to 250°F
- Put the bread cubes on a large rimmed baking sheet in a single layer (use 2 baking sheets if necessary)
- Bake the bread, stirring occasionally, until completely dried out, about 1 hour
- Let the bread cool on the pan until it's needed
While the bread toasts:
- Prep the vegetables and herbs
- Put a large skillet on medium heat and melt butter until foamy
- Add the celery and onions and cook 10 minutes, stirring frequently; a little browning is OK, but really we're just trying to soften them up
- Add the chopped garlic and cook an additional 5 minutes, stirring frequently
- Put the toasted bread into a very large bowl and add the cooked vegetables (make sure you get all of the butter out of the pan, too!), and toss until it's all mixed together
- Add the kosher salt, ground black pepper, herbs, and 1 cup of the broth
- Stir it all together to distribute the liquid and the herbs
- Put in a freezer-safe container and freeze for up to two months (put right into the fridge if using the next day)
On the day before you want to eat the stuffing:
Put the frozen stuffing into the refrigerator so that it can thaw overnight
The day you want to eat the stuffing:
- Preheat oven to 350°F
- Butter a 13x9x2-inch baking dish (or large casserole dish) and set aside
- Remove the stuffing from the refrigerator
- In a large bowl whisk together the 2 eggs and the cup of stock
- Add the stuffing mixture to the bowl of eggs and broth, gently folding it in until the liquid is distributed
- Transfer to the prepared dish, cover tightly with aluminum foil, and bake for 1 hour (an instant-read thermometer inserted into the stuffing should read at least 160°F)
- Remove the foil and bake an additional 10 minutes
- Serve hot
- Leftover stuffing will keep in the fridge in an airtight container for four or five days
Notes
If you want to make the stuffing right before baking it, without resting in the fridge or freezer first, please see this advice about tempering the eggs, so that you don't scramble them!!
You can use fresh bread or stale; since we're drying it out so much in the oven anyway, it doesn't matter.
If you want to save time with dried herbs, use ⅓ the amount (2 tablespoons + 2 teaspoons dried parsley, 2 teaspoons dried sage, 2 teaspoons dried rosemary, and 1 teaspoon dried thyme). The finished dish won't taste quite as amazing, but it will still be really good.
Nutrition Information
Yield
12Serving Size
12 servingsAmount Per Serving Calories 289Total Fat 18gSaturated Fat 11gTrans Fat 1gUnsaturated Fat 6gCholesterol 73mgSodium 602mgCarbohydrates 27gFiber 2gSugar 5gProtein 7g
Nutritional information is an estimate only.
Recipe Card
Vegan Stuffing Recipe
This is a vegan version of my popular vegetarian stuffing recipe. It's rich, delicious, and can be made up to two months ahead!
Ingredients
- 1 lb loaf of good-quality bread , torn or cut into 1-inch cubes
- 3 cups yellow onions, roughly chopped, about 1 pound before peeling and chopping
- 2.5 cups sliced celery, about 4 large stalks, sliced ¼ inch
- ½ cup chopped fresh parsley leaves , about 2 ounces before removing stems
- 2 tablespoon chopped fresh sage
- 2 tablespoon chopped fresh rosemary
- 1 tablespoon chopped fresh thyme
- 16 tablespoon vegan butter, plus more for the baking dish
- 2-3 large garlic cloves, roughly chopped
- 1 teaspoon kosher salt
- ½ teaspoon pepper
- 2 cups vegetable broth, divided
- 6 tablespoon aquafaba, flax egg, or other vegan egg substitute
Instructions
Do first, before vegetable/herb prep
- Preheat oven to 250°F
- Put the bread cubes on a large baking sheet (use 2 if necessary)
- Bake the bread, stirring occasionally, until completely dried out, about 1 hour
- Let the bread cool on the pan until it's needed, then put it into a large bowl
- While the bread bakes, prep the vegetables and herbs
Cook the vegetables
- Put a large pan on medium heat and melt the vegan butter until foamy
- Add the celery and onions and cook ten minutes, stirring frequently; a little browning is OK, but really we're just trying to soften them up
- Add the chopped garlic and cook an addition 5 minutes, stirring frequently
- Add the cooked vegetables to the bowl of bread and toss until its all mixed together
- Add the kosher salt, pepper, herbs, and 1 cup of the broth
- Stir it all together to distribute the liquid and the herbs
- Put in a freezer-safe container and freeze for up to two months (put right into the fridge if using the next day)
On the day before you want to eat the stuffing
- Put the frozen stuffing into the refrigerator so that it can thaw overnight
Bake the stuffing
- Preheat oven to 350°F
- Butter a 13x9x2-inch baking dish (or a similar-sized casserole dish) and set aside
- Remove the stuffing from the refrigerator
- In a large bowl whisk together the egg substitute and the remaining cup of broth
- Add the stuffing to the bowl of egg substitute and broth, gently folding it in until the liquid is distributed
- Transfer to the prepared dish, cover tightly with foil, and bake for 1 hour
- Remove the foil and bake an additional 10 minutes
- Serve hot
- An instant-read thermometer inserted into the stuffing should read at least 160°F
Notes
To also make this recipe gluten-free, just make sure you're using gluten-free bread.
If you want to save time with dried herbs, use ⅓ the amount (2 tablespoons + 2 teaspoons dried parsley, 2 teaspoons dried sage, 2 teaspoons dried rosemary, and 1 teaspoon dried thyme). The finished dish won't taste quite as amazing, but it will still be really good.
Recommended Products
As an Amazon Associate and member of other affiliate programs, I earn from qualifying purchases (but you won't pay anything extra!)

Nutrition Information
Yield
12Serving Size
1Amount Per Serving Calories 304Total Fat 19gSaturated Fat 10gTrans Fat 1gUnsaturated Fat 7gCholesterol 56mgSodium 571mgCarbohydrates 28gFiber 4gSugar 6gProtein 7g
Nutritional information is an estimate only.