This post may contain affiliate links and/or codes. You won’t pay anything extra, but I might make a commission.
New Post: Fancy Baked Ziti
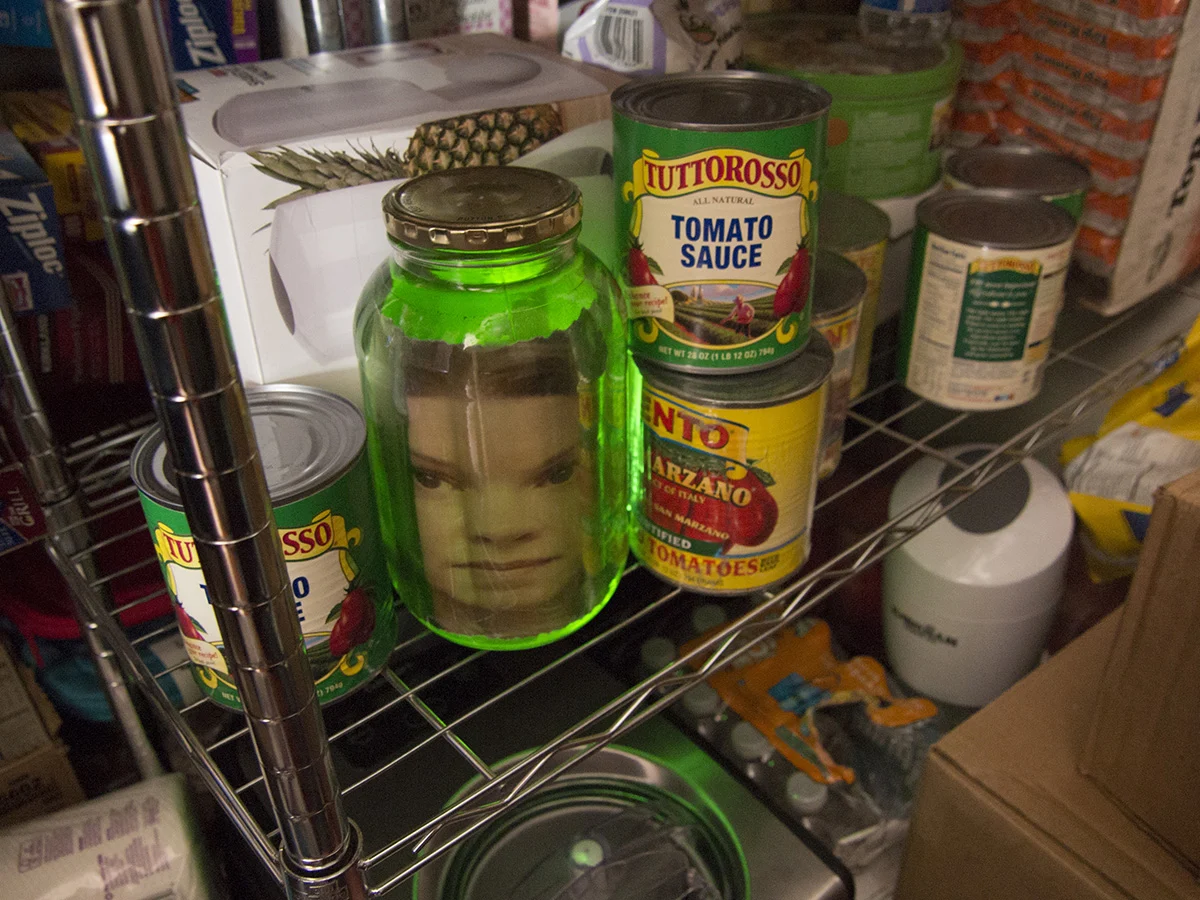
This is an easy DIY Halloween decoration that works outside on a front porch, inside on a table or windowsill, and even in the refrigerator for a great head-in-a-jar prank!

Head in a jar prank
Last year, a few weeks before Halloween, I was visiting my mom. I was cruising around online and saw some plastic brains and other organs in jars for Halloween decorations. I looked at how the water was distorting the items in the jars, and got the idea to try it with pictures. It turned out to be pretty easy!

I put my kids’ heads in a couple of jars (I found most of what I needed in my mom’s house), and then put them in my mom’s fridge and waited. It actually took her a few times going into the fridge to notice them, but when she finally did her reaction was priceless!
I brought them home and set them on our steps for Halloween. The trick-or-treaters got a kick out of them – lots of people stopped and took pictures. This year I’ll add my head, and maybe my husband’s.
Do you want easy, or Photoshop?
I’ve got two versions of the instructions below, because not everyone knows how to use more complicated image editing programs like Photoshop. So, if you want to use a great free online editing program, or even a simple phone app, use the instructions right below. You’ll get great results, especially in the dark.
But if you’re good with Photoshop, you can make the effect look even better by combining front and side images. Those instructions are after the easier ones.
BTW, while you’re here, this is another great way to decorate your house for Halloween, from the inside (but visible from outside). It’s perfect for people who don’t even want to craft enough to put a head in a jar.
And if you’re looking for an easy costume, this might be the best thing I’ve ever come up with.
Easy DIY Halloween Decorations: How to Put a Head in a Jar

This is an easy DIY Halloween decoration that works outside on a front porch, inside on a table or windowsill, and even in the refrigerator for a great head-in-a-jar prank!
These instructions use simple, free image editing programs and apps. If you're good with Photoshop, check out the Photoshop-specific instructions at the end of the post.
Materials
- digital image of a face
- printer paper
- wide-mouth jar with a lid (or some aluminum foil to use as a lid)
- water
- food coloring
- aluminum foil or plastic wrap (optional)
- glow stick
- tape
Tools
- photo editing software or app
- ruler or tape measure
- printer
- scissors
- laminator
- (if you don't have a laminator, contact paper also works; many office supply stores will laminate the image for you)
Instructions
- Prepare the image: Take a picture of the "victim" from the front, preferably with a blank expression. Try to avoid wearing a shirt with a high collar. (I think the eyes look creepier open, but it's up to you.)

- Widen the image: Using photo editing software or an app (detailed instructions below), crop the image to show the head and some of the neck, and then widen the image by about 50%. There are a lot of free programs out there that will let you do this, and I'll demonstrate using two of them. While every editing program is different, the basics should be very similar. This is the look you're going for:

- Using BeFunky.com: BeFunky.com is my favorite online photo editor. While it has some great paid features, you can crop, widen, and download your photo without signing up or paying.
- First, hover over "Create" and then click on "Photo Editor."
- Click on "Open" and upload the image you'll be editing, then click on "Crop".

- Adjust the frame to show the head and neck, and click "Apply

- Click on "Resize".

- Unclick the box for "Lock Aspect Ratio", change X-scale to "150%", and click "Apply".

- Click on "Save" at the top and save the widened image.

- Using Photo Warp: Photo Warp is a free app for Android that you can use to widen your photo. There are also lots of face distortion apps for iPhone. You're just looking for something that will let you use your fingers to distort an image.
- Using Photo Warp, click on "Start" and either take a new picture or choose one from your gallery.
- Crop the photo to show your head and neck, and click on the check mark in the top right corner.

- On the next screen, click on the largest dot in the top left corner, and the use your finger to drag the sides of your face outwards and make your whole face wider.

- Click on the down arrow at the top of the screen to save the widened image.

- Measure your jar: If you already have a jar that you want to use, great. If you're looking for a jar, ideally you want something with a wide mouth; the closer the top of the picture is to the lid, the better the effect will be. And if the jar is too tall, you might not be able to print the picture big enough, so smaller jars are better (just think of it as a shrunken head in a jar!). A 9-inch jar is about as tall as you can go.
- Measure your jar from the bottom to where it starts to get narrower near the top.

- Print the picture: Ideally, you want your head to be about half an inch smaller than the measurement you took of the straight part of the jar. The straight part of my jar measured 6.5 inches, so I want my picture to be about 6 inches tall.
- If you have an editing program that will let you adjust the size of an image in inches, that's the easiest way to do it. Set the height of the image, making sure that the ratio is locked (you've already widened the image, so you want it to stay wide!). Unfortunately, most programs only let you resize by pixels, not inches.
- If your printer will let you set the size of the picture you're printing, you can just make that adjustment when you print. For example, my printer gives me several different sizes for printing images. In this case, I would probably choose 5x7 and trim it down a bit. I could also choose 4x6 and use a wad of plastic wrap or some marbles or stones at the bottom of the jar to raise the picture up a bit. Just get as close as you can, it doesn't have to be exact. Make sure to print on regular paper, not photo paper!

- Prepare the printout: Cut the picture out and put it in the empty jar, just to make sure the sizing is right. (If you used an app that didn't let you crop the image close to your head, you might want to trim a bit off of the sides.)
- Wet your fingers and use them to wet just the edges of the picture, top and bottom, and gently tear off the very edges of the picture. Make sure to only use a tiny amount of water, or the ink will bleed/

- Lay the picture out on a towel to dry, or dry it gently with a hair dryer.

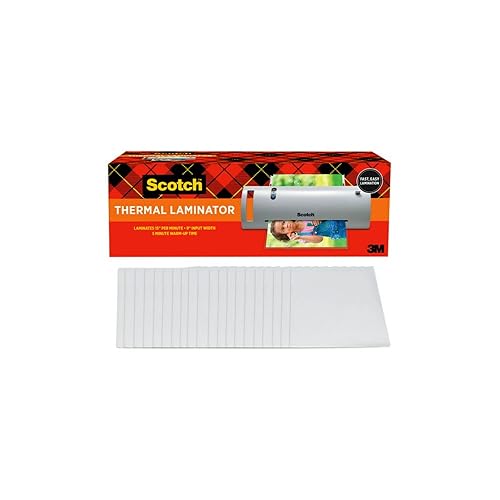
- Once the picture is completely dry, laminate it. If you don't have a laminator, contact paper works fine, but it’s hard to get a perfect seal around the edges. Be aware that some water may seep into the picture. If that happens it won’t be terrible – the effect can actually look good. But it will get worse over time, so you might want to keep the picture dry until it’s time to set up your Halloween display.
- Once the picture is laminated, cut off the extra plastic, leaving about a half-inch buffer all around.
- Prepare the jar: Fill the jar a few inches from the top with water (you want room to stir). Add food coloring to make a murky color – mostly green and red seem to work best, but I throw in a little of everything. Chances are, once you reach the correct color it will be too dark. Just pour half of the colored water out, add clear water to the top of the jar, stir, and you’ll be good to go!

- Put the laminated picture into the jar and screw on the cap (if you don’t have a cap, just use aluminum foil or something else that isn't see-through).
- Optional: before you put on the cap, put some wadded-up plastic wrap between the picture and the top of the jar, to help camouflage where the picture ends.

- Break open a glow stick to activate it, and tape it on the back of the jar.

- Display your jar! It's not quite Halloween yet, so I've put my head in our pantry. I can't wait to see who stumbles upon it first!

Notes
If you already have an image printed out that you want to use, you can skip to the part where you rough up the edges. However, please note that making the image wider and then printing it will have a better effect in the jar.
Recommended Products
As an Amazon Associate and member of other affiliate programs, I earn from qualifying purchases (but you won't pay anything extra!)
How to Put a Head in a Jar - Photoshop Instructions

Are you good with Photoshop? These instructions are for you! If you need something easier, that uses free editing programs or apps, check out the instructions above.
Materials
- 2 digital images of a head: one from the front, and one from the side
- printer paper
- wide-mouth jar with a lid (or some aluminum foil to use as a lid)
- water
- food coloring
- aluminum foil or plastic wrap (optional)
- glow stick
- tape
Tools
- Photoshop
- ruler or tape measure
- printer
- scissors
- laminator
- (if you don't have a laminator, contact paper also works; many office supply stores will laminate the image for you)
Instructions
Prepare the image
Take a picture of the "victim" from the front, preferably with a blank expression, and another from the side. Try to avoid wearing a shirt with a high collar. (I think the eyes look creepier open, but it's up to you.)


Combine the images into one canvas in Photoshop (just flip the side picture and use it for both sides), blending the areas where they meet. This way, the jar will look good from all angles.
This is a lot easier to do with someone who has a lot of hair, but it’s still totally doable with short hair – it’s just harder to blend where the ears and skin meet than where a mess of hair meets. But remember, any mistakes will be a lot less obvious once the picture is in murky water.
If you want to stretch the center of the picture out a little, you can.
These are the pictures I printed out of my kids last year:


Measure your jar
If you already have a jar that you want to use, great. If you're looking for a jar, ideally you want something with a wide mouth; the closer the top of the picture is to the lid, the better the effect will be. And if the jar is too tall, you might not be able to print the picture big enough, so smaller jars are better (just think of it as a shrunken head in a jar!). A 9-inch jar is about as tall as you can go.
Measure your jar from the bottom to where it starts to get narrower near the top.

Resize the image
Change the height of the picture to the height you measured on the jar, minus about half an inch. (I measured the straight part of my jar to be 6.5 inches, so I changed the height of my picture to 6 inches.) Make sure that for this step you’re keeping the ratio of the height and width locked.
Print the picture
If your printer gives you the option of scaling the picture to fit the paper, uncheck that option. You want the picture to print at the exact size you made it, not larger to fill the paper.
Make sure to print on regular paper, not photo paper!
Prepare the printout
Cut the picture out and put it in the empty jar, just to make sure the sizing is right.
Wet your fingers and use them to wet just the edges of the picture, top and bottom, and gently tear off the very edges of the picture. Make sure to only use a tiny amount of water, or the ink will bleed.

Lay the picture out on a towel to dry, or dry it gently with a hair dryer.

Once the picture is completely dry, laminate it.
If you don't have a laminator, contact paper works fine, but it’s hard to get a perfect seal around the edges. Be aware that some water may seep into the picture. If that happens it won’t be terrible – the effect can actually look good. But it will get worse over time, so you might want to keep the picture dry until it’s time to set up your Halloween display.
Once the picture is laminated, cut off the extra plastic, leaving about a half-inch buffer all around.
Prepare the jar
Fill the jar a few inches from the top with water (you want room to stir). Add food coloring to make a murky color – mostly green and red seem to work best, but I throw in a little of everything. Chances are, once you reach the correct color it will be too dark. Just pour half of the colored water out, add clear water to the top of the jar, stir, and you’ll be good to go!

Put the laminated picture into the jar and screw on the cap (if you don’t have a cap, just use aluminum foil or something else that isn't see-through).
Optional: before you put on the cap, put some wadded-up plastic wrap between the picture and the top of the jar, to help camouflage where the picture ends.

Break open a glow stick to activate it, and tape it on the back of the jar.

Display your jar!
These look spookiest in dark. Put them on your steps and see how many people do a double take!

Recommended Products
As an Amazon Associate and member of other affiliate programs, I earn from qualifying purchases (but you won't pay anything extra!)


Vanna
Sunday 3rd of October 2021
I am definitely making this for the Halloween party this year! I cannot wait to see the guests' faces when they saw it! Happy Halloween!
Pro Softwares
Saturday 31st of October 2015
Now this is really cool :P
Kelly
Friday 30th of October 2015
THIS IS AWESOME!
Janine
Thursday 29th of October 2015
This is so cool!!!! I want to make dozens of these.
Andrea
Thursday 29th of October 2015
This would freak me out if I found it in my fridge or pantry. Definitely creative, though!