Homemade Cake Release Recipe (Plus Chocolate Cake Goop!)
This post may contain affiliate links and/or codes. You won't pay anything extra, but I might make a commission.
Latest Post: How to Be a Good Dinner Party Guest


Wondering how to keep a cake from sticking to the pan when baking? Just spread this three-ingredient cake release onto the pan! It even works in Bundt pans with the most intricate details. Also known as cake goop, this paste is super easy to make, and will keep at room temperature for three months.

Cake Disasters
Let me set the scene for you:
People are coming over. Wanting to impress them, you bought a fancy Bundt cake pan, and prepped the pan according to the recipe's instructions, greasing and then flouring, trying to get into every nook and cranny of the pan's design.
Or maybe you made your special fudgy brownies, and used Wilton Cake Release Spray, which you'd seen recommended on tons of websites.
And this happened:
Listen, that was ten years ago. I've learned a LOT since then.
Why homemade cake goop is the best
- It's cheap
- It's easy to make
- It keeps for a long time
- It doesn't leave anything gross on your pans
- It doesn't get all over your workspace
- It doesn't leave a taste on your baked goods
- It's invisible once baked
- It works on the most detailed, complicated pans
- I've gotten a perfect cake result every single time I've used it
What is in homemade pan release?

It couldn't be simpler. You just mix together equal amounts of all-purpose flour, vegetable shortening, and vegetable oil.
Is there a gluten-free version?
Yes, you can substitute whichever gluten-free flour you would normally use for baking. The vegetable shortening and oil are already gluten-free.
The chocolate cake release version, which I talk about below, is already gluten-free, since unsweetened cocoa powder is gluten free.
How do you store cake release?

Cake release should be stored in an airtight container, like a mason jar or other glass jar or container (I use these). You could also store it in some kind of plastic container, but I try not to store anything oily or greasy in plastic, because it's really hard to get the residue out-it kind of soaks into the plastic.
How long will cake release last?
I've stored it at room temperature for up to three months, and in the refrigerator for up to six months.
How do you apply cake release to pans?

I apply it with a silicone pastry brush (I have these, I absolutely love them). You could also use your fingers, but that would be messy, and it's easier to jab the paste into tight areas with the silicone brush.
Other ways of prepping pans
I want to go over some of the other ways you can prep a pan for baking, and why they're not as good as homemade cake pan release.
Cake release spray
I used this stuff for a few years, because I mistakenly thought that it was the best way to keep cakes from sticking. After all, spraying seemed like the easiest way to get into corners of pans. But when I actually started making Bundt cakes and buying other fancy pans, I discovered that it didn't really work that well at all.
The only advantage cake release spray has is that it's quick. You can get into all of the angles and corners of the most detailed baking pan pretty quickly. But I'd rather spend a few minutes preparing my pan in order to get better results.
Homemade cake release goop is not just cheaper than anything I could buy, but it also works better than store-bought sprays, and I don't get extra spray all over my kitchen.
Parchment paper

I love parchment paper, and if I'm just doing round or square layer cakes that will be frosted, that's what I use. I buy the kind that's coated with silicone and I don't bother greasing it like some instructions say. And yes, I buy round ones for my round pans. I hate cutting parchment circles.
When I'm using parchment paper on the bottom of a pan I usually leave the sides of the pans uncovered and ungreased, because if I'm frosting the cake I don't care if I have to run a knife around the sides and rough them up a little bit. Super quick and easy. And for cookie sheets, parchment is a no-brainer.
But obviously, if you're using a Bundt pan or some other kind of non-flat pan, parchment will be useless.
Greasing and flouring
Greasing a pan and then adding a light dusting of flour is probably the most common instruction I see for prepping detailed pans. In fact, it's on the box of one of my pans.
You do this by spreading grease all over the pan, then sprinkling in enough flour to get some everywhere, then turning the pan upside down and tapping it to get the excess flour out.
No matter what I did, this method got a thin layer of flour around the area where I was baking. Even if I did it right over the sink, flour is very powdery and floats around. I hated this method. But I tried it many times, because I figured that the people who made the pans knew what they were talking about.
The results were hit and miss.
Plus, it left a dull coating on darker cakes. So I tried it with cocoa powder instead of flour, but guess what? Cocoa powder is even finer than flour, and got everywhere. Plus, it's more expensive than flour, so I hated wasting the excess.
Nonstick cooking spray
I literally, physically cringe when I see baking instructions say to coat a pan with cooking spray. Please don't ever do this. Please.
Not only does it not work well, but it will leave a sticky residue on your pans that will be almost impossible to get off.
Which cakes and pans should you use this with?

I definitely use my homemade pan release with any cake that's not going to have a coating of frosting on it, because I want the outsides of those to look flawless, and with any pan that I can't just slap a piece of parchment on. Definitely Bundt pans, pans with curved bottoms, and pans with details and little corners.
But I also usually use it with regular old cake and loaf pans. If the recipe calls for lining the bottom only of a pan, I make sure to only put the cake release on the bottom, not up the sides.
The only pans I never use this with is muffin pans. I tried it a couple of times, and it just wasn't worth the time. Paper muffin liners work better and are much quicker. (And if you're wondering what's up with those foil liners, read this!)
What about chocolate cake and brownies?

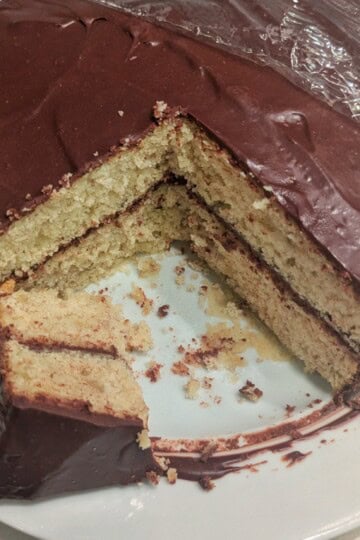
That's right, I said this stuff was invisible once baked! But that's only if you use the chocolate version of cake release for darker batters.
Until yesterday, I just used the normal flour-based recipe for everything. And I'd used it a few times with chocolate cake batter, so I knew it left a visible film on darker cakes. I was usually frosting these cakes, so who cares?
But I'd just gotten a new pan, and wanted to make brownies in it. These would not be covered in frosting or anything like that, just a light dusting of powdered sugar, so I didn't want there to be a dull film on the dark brownies.

I'd tried using cocoa powder before when greasing and dusting a cake pan, so I wondered if I could substitute it for the flour in my cake goop recipe. I Googled around, and the best that I could find from a reliable source was a mention on a well-known food site that a friend of the author had said you could substitute unsweetened cocoa powder. But they didn't even try it!
So, I needed to be the guinea pig.

At first, I tried the amounts of the ingredients that I use for the regular goop recipe. I did a quarter cup of Hershey's Cocoa Powder, a quarter cup of Crisco, and a quarter cup of vegetable oil. But that was runnier than the regular goop, and this stuff needs to stick to the sides of the pan-I didn't want it sliding down.
So, I added more cocoa powder, until I thought it was thick enough (it ended up being the same weight as when I use flour).

Brownie test
I made a third of a batch of my usual fudgy brownie batter, and then brushed my chocolate cake goop into all of the little corners of my beautiful new pan. It took about five minutes, but I wanted to make sure I'd covered every part.
I didn't put it all the way up the sides, because I wasn't planning on filling it very full. I figured if this was a fail, at least I wouldn't be wasting too much batter.
But when I poured it all into the prepared pan, the higher parts of the snowflake pattern were barely covered. I was afraid it might break when I took it out of the pan or tried to move it.
So, I made another third of the recipe and added that. I should have painted more chocolate goop higher onto the pan's sides, but I didn't, because I forgot that the brownies would rise that much (they actually went higher than the pan while baking, but settled back down to the perfect height). Oops. I mean, it's not like I haven't made this same brownie recipe a couple hundred times.
I baked these brownies a bit more than I normally would, to be safe. And then the hard part: letting them cool completely. It took several hours.
The result
Finally, the time had come. I put a glass plate over the pan, flipped everything over, patted the bottom of the pan gently, and...nothing.
I flipped it back over, and I could see that the very top was sticking in some places, because I hadn't painted the goop high enough. If I pressed down gently I could see exactly which parts were sticking, and I carefully loosened those parts with a plastic knife (I only had to go down about half an inch).
Then I tried again, and the giant, beautiful snowflake dropped out perfectly! And best of all, there was absolutely no residue or powder or anything visible on the outside.

But tasting it would be the final test. And it was delicious!! It tasted exactly like my brownies always taste.

So now I have two kinds of cake pan release, for both light and dark batters.
I'm planning on making a gingerbread cake next week, and I think I'm going to mix the two cake release pastes together to get something closer to the color of gingerbread. I'll let you know how it works out!
Recipe Card
Cake Release Recipe

This homemade cake release paste (also known as cake goop and magic cake pan release) works on the most intricate of Bundt pans and other decorative pans, giving you a beautiful cake every time.
Ingredients
- ¼ cup (30 grams) all-purpose flour
- ¼ cup (48 grams) vegetable shortening, room temperature (like Crisco)
- ¼ cup (48 grams) vegetable oil
Instructions
- Put the ingredients into a medium mixing bowl and beat until creamy, either by hand or with an electric mixer
- To use, brush onto the inside of a cake or Bundt pan with a silicone pastry brush, getting into every corner, then add your batter and bake according to your recipe's directions
- Let the cake cool completely in the pan on a wire rack before turning the pan over and removing the cake
- Store the cake release in an airtight container at room temperature for up to 3 months, or refrigerated up to 6 months
Recommended Products
As an Amazon Associate and member of other affiliate programs, I earn from qualifying purchases (but you won't pay anything extra!)


Nutrition Information
Yield
10Serving Size
1Amount Per Serving Calories 17Total Fat 1gSaturated Fat 0gTrans Fat 0gUnsaturated Fat 1gCholesterol 0mgSodium 0mgCarbohydrates 2gFiber 0gSugar 0gProtein 0g
Nutritional information is an estimate only.
Recipe Card
Chocolate Cake Release Recipe
This homemade chocolate cake release paste uses cocoa powder instead of flour, and is perfect for darker cakes and brownies.
Ingredients
- 6 tablespoons (30 grams) unsweetened cocoa powder (like Hershey's Cocoa)
- ¼ cup (48 grams) vegetable shortening, room temperature (like Crisco)
- ¼ cup (48 grams) vegetable oil
Instructions
- Put the ingredients into a medium mixing bowl and beat until creamy, either by hand or with an electric mixer
- To use, brush onto the inside of a cake or Bundt pan with a silicone pastry brush, getting into every corner, then add your batter and bake according to your recipe's directions
- Let the cake cool completely in the pan on a wire rack before turning the pan over and removing the cake
- Store the cake release in an airtight container at room temperature for up to 3 months, or refrigerated up to 6 months
Recommended Products
As an Amazon Associate and member of other affiliate programs, I earn from qualifying purchases (but you won't pay anything extra!)
Nutrition Information
Yield
10Serving Size
1Amount Per Serving Calories 17Total Fat 1gSaturated Fat 0gTrans Fat 0gUnsaturated Fat 1gCholesterol 0mgSodium 0mgCarbohydrates 2gFiber 0gSugar 0gProtein 0g
Nutritional information is an estimate only.