How to Arrange Grocery Store Flowers in a Vase (for beginners!)
This post may contain affiliate links and/or codes. You won't pay anything extra, but I might make a commission.
Latest Post: How to Be a Good Dinner Party Guest


If you don't know how to arrange flowers in a vase, don't worry. I didn't either. I was given a lesson, and I took what I learned and applied it to cheap grocery store flowers! See what I did, with step-by-step instructions on how I did it.

How to make flower arrangements
Last week I wrote about an event that I went to hosted by Honeywell, where we learned about seasonal allergies and how to alleviate their symptoms. It was an informative event, and came with a delicious breakfast and a great view of Manhattan:

I mentioned in that post that flowers get a bad rap when it comes to allergies. People assume that flowers are a big cause of seasonal allergies.
But they aren't, because their pollen is very heavy and isn't carried around on the wind very easily. If you're allergic to flowers, you have to be fairly close to them to have an allergic reaction.
The event ended with a fun flower tie-in: Stacy Neylan of Winston Flowers gave us an informative but simple lesson on how to arrange flowers!

I was excited about this, because I never know what to do with flowers. I usually just take them out of their wrapping and plop them in a vase. And they look fine, but not great.
How not to arrange flowers
However, in this short lesson, I was able to identify three things that I was doing wrong with my flowers at home:
- I was using vases that were way too wide
- I was cutting the flowers much too long
- I wasn't using nearly enough flowers for the vase
Knowing what I was doing wrong, I was able to start doing things right!
A lesson in how to arrange flowers in a vase

For our lesson, we had all of the components of a great flower arrangement. Stacy led us through the basics:
- Divide your flowers by type so that you can see what you have to work with
- Use the biggest flowers to set up the structure, then fill in around those with the smaller flowers
- Cut the stems on a diagonal, so that if they're pressed against the bottom of the vase they can still suck up water.
- Use the flowers to cover the rim of the vase.
- Mint and other herbs make great accents for flower arrangements
In the end, we all had gorgeous vases of beautiful flowers that we got to take home.
What about cheap flowers?
But I knew that these were really good quality flowers. Plus, we'd been given a selection of flowers to use that would fit in the vase. What about if I were completely on my own, with the cheap flowers from my grocery store? Would I still be able to make something pretty?
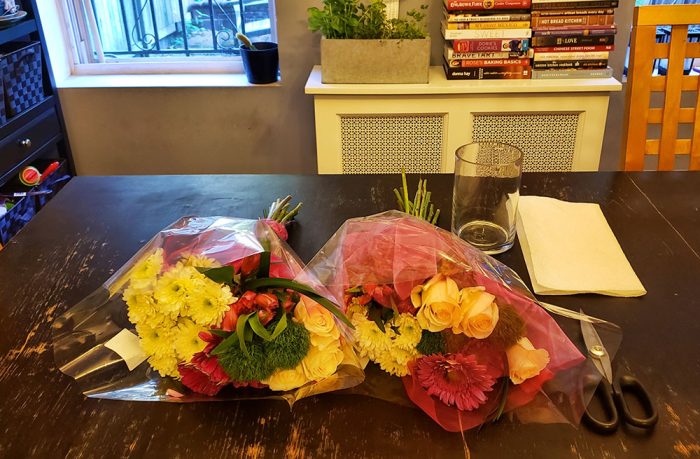
I bought two bunches of flowers and took them home to try.
In the end, I was able to make three separate arrangements!

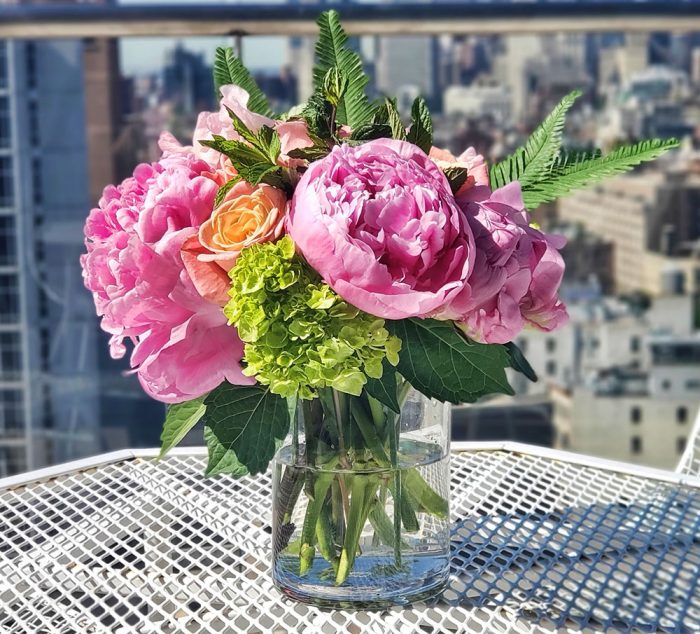
I started with the vase I'd brought home from the event. I liked the way the pink and white flowers looked together, so I just used those. They were different colors and sizes, but still had the same basic look.

Once that vase was full, I started on a taller vase of my own. Since all of the remaining flowers were pretty much the same size, I used the roses as the anchors and filled in with the other flowers.

I loved the first two. The third one, in the wine bottle? Well, that was just literally the leftovers. Someone else might have just tossed them, but I didn't want to. So while it wasn't the prettiest of arrangements, I was happy that I wasn't wasting any flowers.

I think I did pretty well for my first time solo! If I can take ordinary flowers and turn them into something I'm proud to display, you can too.
Recipe Card
How to make floral arrangements, step by step

If you don't know what to do with flowers, I'm going to show you how to put flowers in a vase in a way that's simple and quick.
Materials
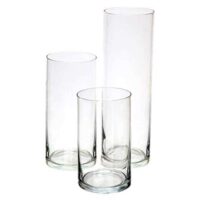
- Round vase
- Flowers
- Plant food
- Water
Tools
- Scissors
- Small towel or paper towels
Instructions
- Gather all of your materials and give yourself plenty of space to work
- Separate your bouquet(s) into groups of similar flowers and greenery
- Fill your vase with about 2 cups of cool tap water, and add the plant food that came with your flowers
- Put the vase at the edge of your table and starting with the largest flowers, hold each flower against the outside of the vase so that you can see where to cut the stem, so that the flower will rest on the rim of the vase (remember, you can always cut a little more off, but can't add any back if you cut it too short!)
- Cut each stem at enough of an angle so that no matter now slanted the stem is, it won't be able to lay flat against the bottom of the vase (it won't be able to suck up any water)
- If there are any leaves on the stem, remove all of the leaves that could possibly be under the water level (they will rot and smell)
- After you've placed a few of the large flowers around the rim, fill in the rest of the rim with some smaller flowers
- Going back to your largest flowers, cut a few an inch or so taller than the last group, so that the flowers in the middle of the vase sit higher than the ones around the rim
- Repeat with the smaller flowers, filling in the gaps
- If you have any greenery or babies breath, place those around the vase where you see fit
- Turn the vase all around, making sure that all sides look good
- Change the water every 2-3 days


Notes
Depending on how many flowers you started with, you may be able to fill 2 or 3 vases.
Recommended Products
As an Amazon Associate and member of other affiliate programs, I earn from qualifying purchases (but you won't pay anything extra!)